
C#
Better C# Switch Statements for a Range of Values
By hackajob Staff
In one of our previous articles (which you can find here) we looked at how to implement Linked Lists in Java. This time, we’re delving into the fundamental data structures that are stacks, and queues. You’ll find these data structures highly used in Computer Science to implement functionality and logic.
So how can you implement these? As usual, we’ve got you covered with this tech tutorial. We'll go through some of the theory behind stacks and queues, and then dive straight into Java code and see how we can implement them from scratch. Our take? Knowing how to implement data structures from scratch and performing operations with them will not only enhance your skills as an engineer but also makes you more attractive to potential employers.
Stacks are linear data structures that follow the LIFO principle, that is, last in first out. This simply means that insertion of a new node and removal of a node takes place from the end. This is referred to as the top in stack terminology. The operations are referred to as push and pop for insertion and deletion respectively.
Stacks are extremely useful data structures used very widely in computer science for recursive function calls. They are also used when control passes from one point of a program to another to store the return addresses.
Queues, on the other hand, follow the FIFO principle, which is first in first out. They represent an actual queue in real-life where people who enter first are serviced first and so on. Insertion operation is known as enqueue and deletion is known as dequeue. Queues are also extremely popular in networking as well as system design. They are widely used for controlling access to resources. A good example is an office printer. You might have used a network printer to print documents and this uses a queue internally so that multiple people can request at the same time, but will be processed sequentially.
Stack Operations – Push and Pop
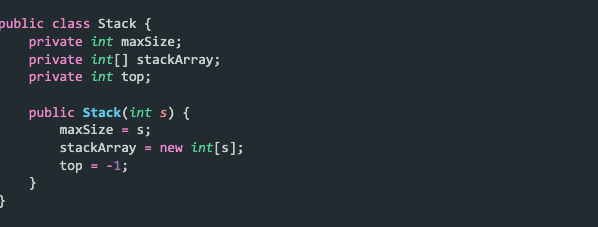
First up, we have stacks. Implementing them in Java is pretty straightforward, so you'll enjoy trying this. Firstly, create a class and name it Stack. We have three variables that determine the stack size, the elements themselves, and the top element.
We have a constructor that is used to initialise the stack with the max size value. After this, an array of that size is created and top is initialised to -1. You might be thinking about why top is initialised to -1. Remember Java uses zero-based indexing which means that the first element would be at index 0, the second one would be at index 1, and so on.
Now, let’s take a look at the insertion and deletion operations, more popularly known as pushing and popping.
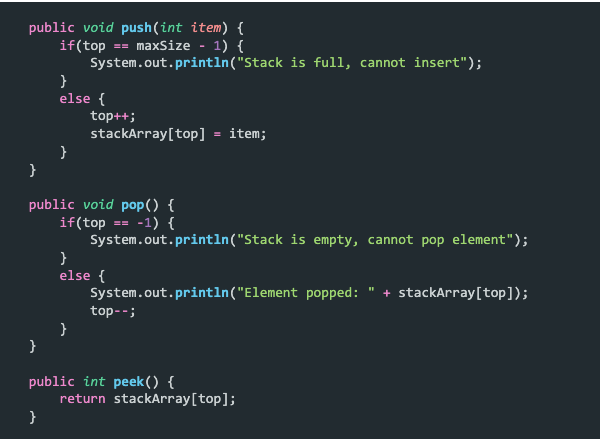
We'll start by looking into pushing. The function accepts an integer value that is to be pushed onto the stack. At this point, check if the top is pointing to maxSize – 1, which means that the stack would be full and we cannot insert. If it's not full, we increment the top value and insert the item at that index in the array.
Popping is a much easier operation. We first check if top is equal to -1, which is the initial condition of the stack being empty. If that's the case, we cannot pop anything out of it. If not, we print out the element that is currently at the top and decrement it. The peek function is simply a utility function that allows us to view which element is at the top currently.

Check out the driver code above to create a stack of size 3. We insert 3 elements into it after which no insertion is possible. On the last line, we pop off the top element. The below diagram is a helpful visualisation of the entire process. Once top is equal to 2 (which is maxSize – 1), we cannot insert elements further. When we call the pop function, the topmost element is deleted and the value of top is decremented by 1.

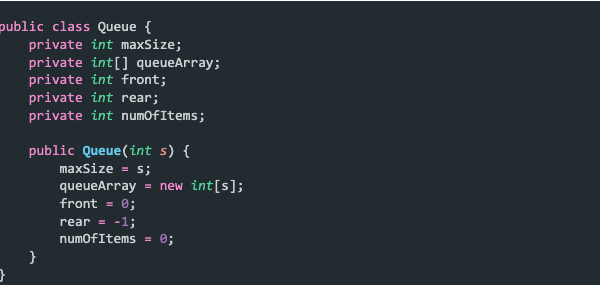
The queue is very similar to the stack class that we saw earlier. Instead of top, we have front and rear. This is because, in a queue, insertion happens at the rear and deletion happens from the front. Then we have an array for the queue itself, the maximum size, and also a count of the number of items. We have four utility functions as shown below:
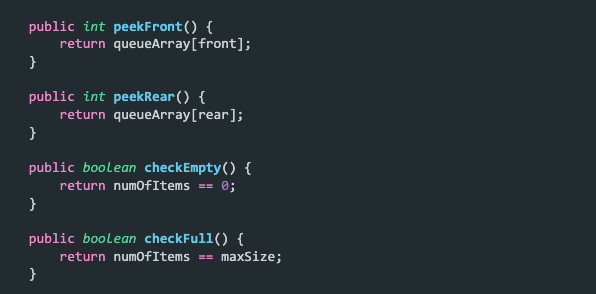
They are pretty self-explanatory. Peeking is used to view the current item at the rear and front. Check empty and check full is used to check whether the queue has any items or not. Now let’s get into the actual implementation of the enqueue and dequeue operations.
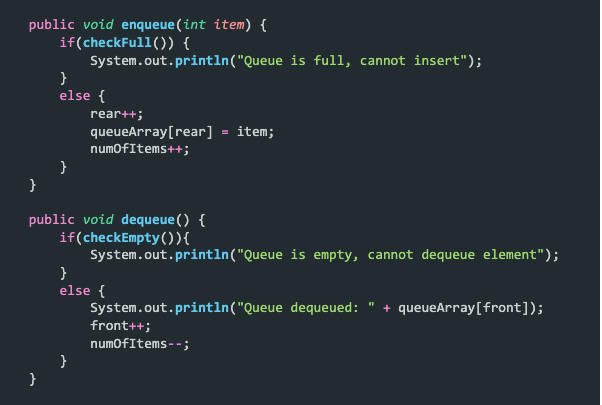
The enqueue function takes the element to be inserted and checks whether the queue is full, before inserting it to the rear. This is done by incrementing the rear pointer and appending it to that index. We also increment the number of items by 1.
The dequeue function, which checks if the queue is empty using the utility function that we saw earlier and if not, displays the element currently at the front and decrements it by one. Like before, we also decrement the number of items in the queue by 1.
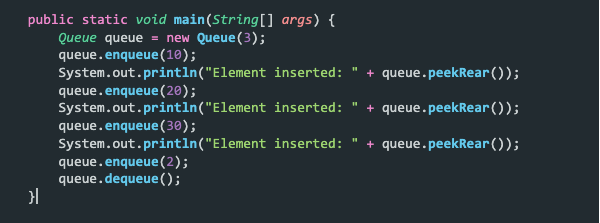
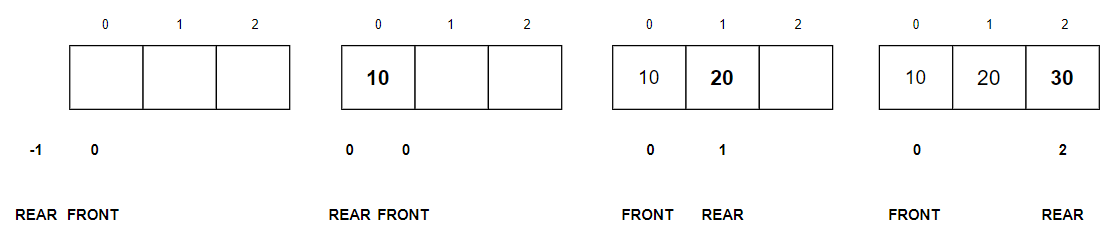
Just like we did earlier, check out the driver code above to create a queue of size 3. We will insert 3 elements into it, after which the queue becomes full. We will then remove one element as well. The visualisation below will help you understand the process better.

That brings us to the end of this tech tutorial. We hope you learned something but more importantly had fun doing it! As you can see, when you get into it - implementing stacks and queues is really quite easy. If you'd like to do more or improve: try doing more complex operations with stacks and queues, or try using objects instead of primitive types and see if you can use them in a project to implement a particular functionality.
This is the second article in our series of data structure implementations using Java and we will soon be adding more. Like what you've read or want more like this? Let us know! Email us here or DM us: Twitter, LinkedIn, Facebook, we'd love to hear from you.