
C#
Better C# Switch Statements for a Range of Values
By hackajob Staff
Hello to all of our new and existing readers! If you’re climbing up the ranks of all-things React Native, you know that you’ll inevitably need to have a database in the cloud. Whilst you can deploy an application using Heroku or various AWS services, at hackajob, we believe that Firebase is one of the easiest and most documented platforms to integrate with any app.
It’s crucial to note that Firebase isn’t just an online database for applications and includes lots of other features, such as cloud hosting, storage, analytics and authentication. For databases in particular, Firebase offers two options: Realtime Database and Firestore. In this tutorial, you’ll be using the Realtime Database option.
The app you’ll be creating today will feature a to-do list with all four CRUD options: Create, Read, Update and Delete. Because the app will be a single page application with a Firebase connection, you won’t be managing the authentication in this case.
In the first part of this tutorial, you’ll be working on the app itself. All functions will be mocked.
Start by creating the app:
react-native init todoApp && cd todoApp
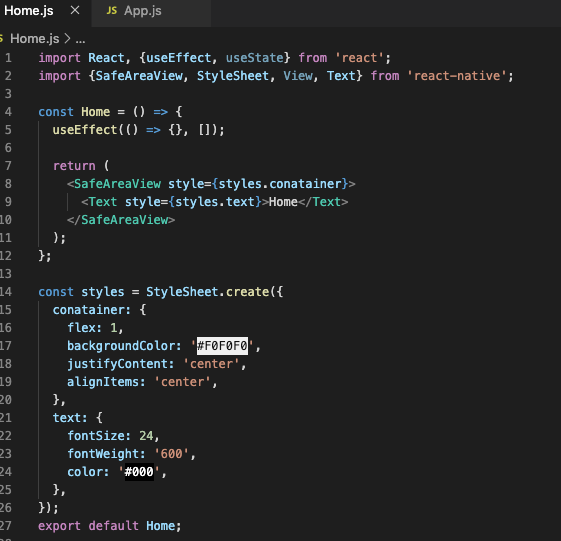
You won’t be working in the ‘App.js’, so make a new file and name it ‘Home.js’. You’ll be using hooks so if you aren’t familiar with them yet, make sure to check out our tutorial before going any further.
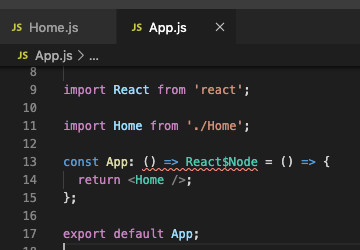
Edit ‘App.js’ to import the ‘Home’ and show it:
In ‘Home’ you’ll have a button at the bottom of the page with an ‘add’ option that’ll open a modal within the input field. Your screen will now be divided into two sections: ‘List’ and ‘Button’. To add a new task, the button will set the visible modal state to ‘true’ and your modal will then appear.

It’s time to add your modal component (which will have an input field to add new tasks). Here, you’ll have a new state titled ‘newTask’ as well as an additional array of tasks.
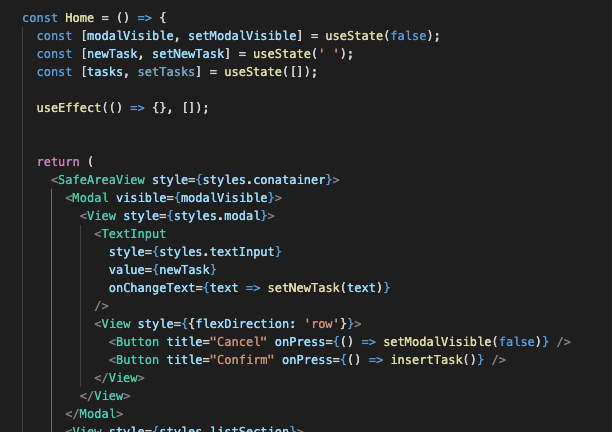
Remember that in this part of the tutorial, you’ll only work in the ‘states’ and will use some mocks to fake your connection with Firebase.
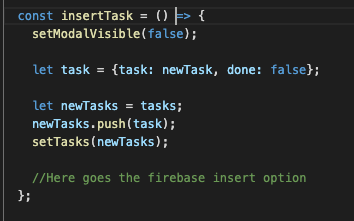
Your task object will be something like this:
{id: firebase returned key, task: ‘string’, done: boolean}
Note that you won’t have the Id in the first instance because it’ll be returned right after the insert.
In this next step, you’ll only fill your list with some fixed values:
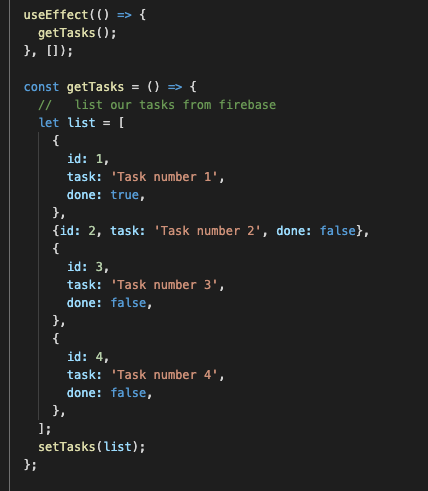
When the application starts, you’ll use ‘useEffect()’ to fill your tasks.
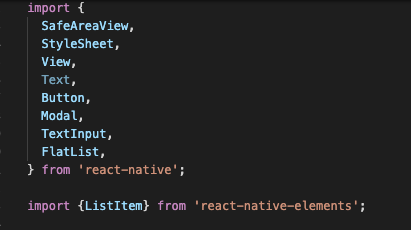
To show your tasks, use the ‘react-native-elements ListItem’ component and execute the following commands in your terminal:
npm i react-native-elements --save
npm i react-native-vector-icons —save
react-native link react-native-vector-icons
Import the ‘ListItem’ and ‘FlatList’ components:
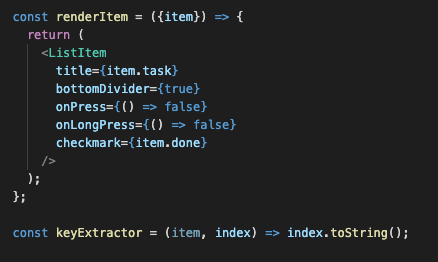
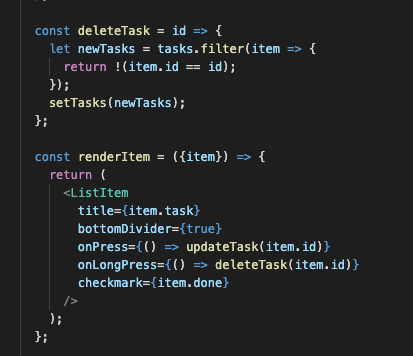
Declare the ‘renderItem’ function as well as the ‘extractKey’:
Use the ‘FlatList’ component inside the ‘List’ section in the app:

You’ll use a ‘normal press’ to set your task to done, as well as a ‘long press’ to delete it:
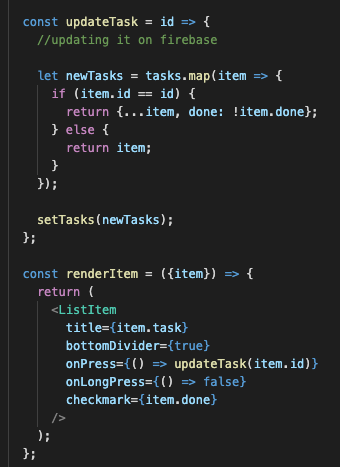
Remember to update the ‘onPress’ props in ‘ListItem’.
In the first instance, you’ll use an ‘array filter’ to remove your component:
In its current state, your app should look like so:
This is the end of part one of this tutorial. In part two, you’ll be learning how to create a Firebase application and connect it with your app.
Like what you’ve read? Be sure to take a look at our other React Native tutorials.